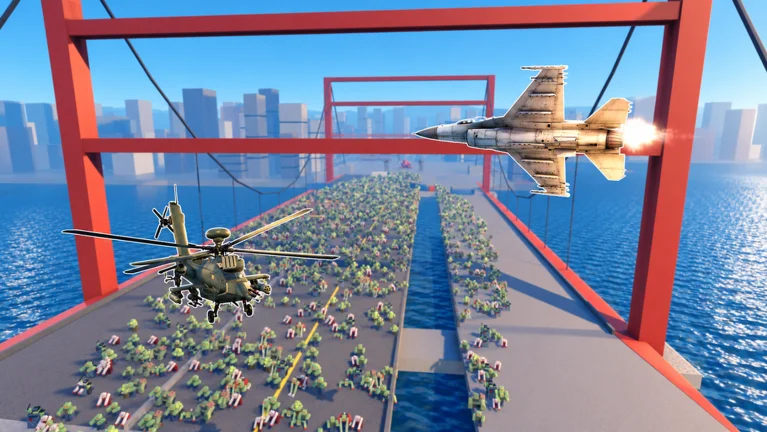
- Zombie Air Force enemies fall into three tiers: standard zombies, special enemies, and Behemoths.
- Threat priority matters more than enemy health when choosing targets mid-wave.
- Area damage handles groups; focused damage is reserved for durable elite targets.
- Behemoths require team coordination, escape routes, and add control to defeat safely.
- Positioning is your strongest defensive tool against every enemy type in the game.
Enemy Types and Threat Levels
In Zombie Air Force, survival depends on reading the battlefield before committing your damage. Every wave mixes low-pressure zombies with high-priority threats, and pilots who tunnel-vision on the biggest target often lose the objective to the swarm behind it. Enemy priority should always be based on immediate danger rather than raw health pools.
The game's enemy roster breaks down into three functional categories:
| Enemy Type | Category | Threat Level | Main Danger |
|---|---|---|---|
| Standard Zombies | Common enemy | Low to medium | Overwhelming numbers, surrounding objectives |
| Special Enemies | Priority enemy | Medium to high | Disrupting positioning, shrinking safe space |
| Behemoths | Boss-level threat | Very high | Heavy area attacks, sustained battlefield pressure |
Never spend every powerful ability the moment a wave begins. Hold enough damage and defensive resources for special enemies or a Behemoth arriving later in the wave.
Standard Zombies: Managing the Horde
Standard zombies are the backbone of every wave. Individually weak, they create pressure through sheer numbers, and they become genuinely dangerous only when allowed to surround players or pile onto a defended objective. Treat them as a control problem, not a damage race.
Their attack pattern is direct close-range pressure. That means your best response is area damage aimed at clusters:
| Situation | Recommended Response | Efficiency |
|---|---|---|
| Tight groups on approach lanes | Area damage rockets or strafing runs | ★★★★★ |
| Zombies near the objective | Clear the nearest path first | ★★★★★ |
| Scattered singles far away | Ignore or pick off opportunistically | ★★☆☆☆ |
| Horde closing around your position | Reposition immediately, then attack | ★★★★☆ |
If enemies are closing every path around you, reposition before the area becomes crowded. A moving pilot outdamages a stationary one simply through better uptime.
Special Enemies and Behemoths: Priority Targets
Special enemies behave more dangerously than standard zombies. They can disrupt your positioning and shrink the team's safe space, so ignoring them while farming routine kills is a common cause of failed runs. Identify them the moment they spawn, call the target in co-op, and use crowd control or defensive movement to neutralize their disruption.
Behemoths are the game's boss-level threat and dominate battlefields when the team loses positioning:
Behemoth Traits
- Far greater durability than regular enemies
- Heavy attacks over a wide area
- Controls the map if left unchecked
Counter Tactics
- Assign focused damage players to the Behemoth
- Maintain distance and keep escape routes open
- Continue clearing adds instead of tunneling on the boss
Team Split
- Damage dealers focus the Behemoth
- Control players manage the wave
- Support players protect the objective and weak lanes
The most common Behemoth failure is the entire team tunneling on the boss while standard zombies overrun the objective. Split roles before the fight starts.
For Behemoth encounters, a dedicated single-target build shortens the fight significantly, while teammates running area damage keep the surrounding wave controlled.
Step-by-Step Target Priority Routine
Follow this sequence every wave to keep your runs stable:
Scan the Wave
Check the wave indicator, identify the main attack direction, and spot any special enemies or Behemoths before firing.
Clear Movement Blockers First
Remove enemies blocking repositioning paths or threatening the objective before dumping damage into durable targets.
Control the Groups
Use area attacks on clustered standard zombies to stop the horde from surrounding your position or the objective.
Focus Priority Targets
Once positioning is safe, direct concentrated fire at special enemies, then the Behemoth.
Reset Before the Next Wave
Rebuild defenses, reserve attack capacity, and reinforce weak lanes before the next wave indicator fills.
In co-op missions, assign players to separate attack zones and combine focus fire on dangerous enemies. Duplicating the same build across the whole team leaves you exposed to whatever that build cannot handle.
Enemy Response Checklist and FAQ
Enemy Mastery Checklist:
- Identify special enemies within seconds of spawn
- Keep at least one escape route open at all times
- Split crowd damage and focused damage roles in co-op
- Reserve abilities for Behemoth phases
- Clear adds before committing to a boss target
A fast-clear build handles standard waves, but Behemoth encounters demand concentrated single-target damage. Match your loadout to the mission rather than running one setup everywhere.
Q: What are the main enemy types in Zombie Air Force?
There are three tiers: standard zombies that pressure through numbers, special enemies that disrupt positioning, and Behemoths, which are boss-level threats with heavy area attacks and high durability.
Q: Should I attack the Behemoth first in Zombie Air Force?
Not always. Clear enemies that block movement or threaten the objective first, then assign focused damage to the Behemoth while other players keep the remaining wave controlled.
Q: How do I stop standard zombies from overwhelming my defense?
Use area damage against grouped zombies on approach lanes, keep moving so you cannot be surrounded, and clear the nearest path around your objective before targeting anything else.
Q: What is the biggest mistake during Behemoth fights?
The whole team tunneling on the boss while adds overrun the objective. Split roles so damage players attack the Behemoth while control and support players manage the wave and protect the frontline.