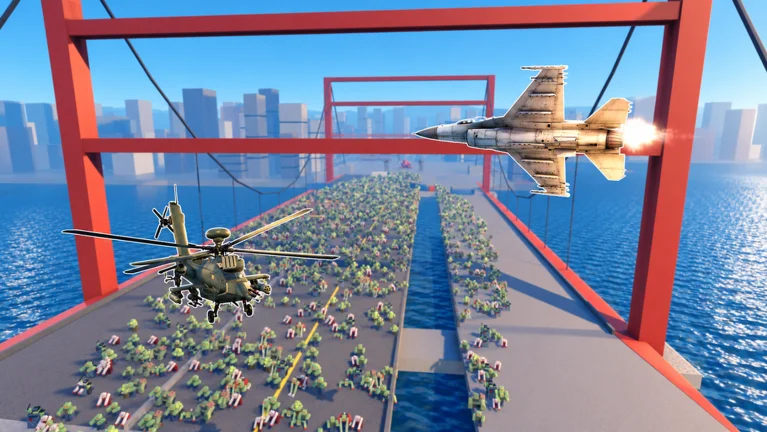
- Zombie Air Force weapon guide: Compare rockets, machine guns, airstrikes, and defenses.
- Best early pick: Machine guns for consistent, low-cooldown wave damage.
- Best boss pick: Rockets focused on Behemoth burst damage windows.
- Key rule: Match your weapon to the enemy type, not to raw damage numbers.
- Co-op tip: One player carries area damage while another handles single-target pressure.
Zombie Air Force Weapon Types Overview
In Zombie Air Force, your arsenal breaks into four weapon categories: machine guns, rockets, airstrikes, and defensive structures. Each fills a distinct combat role, and the strongest pilots learn to rotate between them instead of relying on a single option for every wave. Because the game is built around co-op zombie defense and frontline pushing, weapon value is judged by how well it controls groups, sustains damage, and handles giant Behemoth threats.
Machine Guns
- Role: Sustained single-lane damage
- Fast firing, low cooldown
- Great for standard zombie groups
- Weaker against armored Behemoth hide
Rockets
- Role: Burst area damage
- High damage per shot, longer cooldown
- Ideal for dense clusters and boss phases
- Best saved for high-value targets
Airstrikes
- Role: Map-wide wave control
- Covers large areas at once
- Longest cooldown of the four types
- Strong panic button for overwhelmed lanes
Defenses
- Role: Area denial and frontline support
- Slows and weakens approaching hordes
- Pairs with aerial damage windows
- Essential for longer survival missions
The table below summarizes how each category performs across the situations you will face most often.
| Weapon Type | Damage | Cooldown | Best Against | Wave Rating |
|---|---|---|---|---|
| Machine Guns | Medium, sustained | Short | Standard zombies | ★★★★ |
| Rockets | High, burst | Medium | Clusters, Behemoths | ★★★★★ |
| Airstrikes | High, area | Long | Dense waves, emergencies | ★★★★ |
| Defenses | Low, control | Continuous | Approach routes | ★★★☆ |
Weapon choice is situational. A rocket that deletes a packed horde in one shot is wasted on a lone straggler, while machine gun fire chipping a Behemoth barely moves its health bar. Always ask what the current wave actually demands before firing.
Weapon Roles in Combat
Every weapon in your loadout serves one of three battlefield jobs: wave clearing, priority target damage, or frontline control. Missions in Zombie Air Force throw dense hordes, special enemies, and Behemoths at you in overlapping waves, so the pilots who assign each weapon a clear job clear stages far more consistently.
Wave clearing weapons value area coverage and uptime. They keep standard zombies from surrounding your position or objective. Priority damage weapons, especially rockets, concentrate force on special enemies and Behemoths whose pressure can break a run. Frontline control comes from defenses and airstrikes, which shape where enemies can safely walk and buy your team breathing room.
| Combat Situation | Best Weapon | Why It Works |
|---|---|---|
| Dense standard horde | Rockets, Airstrikes | One strike affects multiple targets |
| Special enemy appears | Machine Guns + focus fire | Fast, reliable pressure on a single threat |
| Behemoth phase | Rockets, saved burst | High damage per shot against huge health pools |
| Lane about to break | Defenses + Airstrike | Instant area denial and breathing room |
| Between waves | Machine Guns | Cheap chip damage, preserves cooldowns |
Do not dump every rocket and airstrike the moment a wave spawns. Special enemies and Behemoth phases often arrive mid-wave, and running dry on cooldowns at that moment is one of the most common causes of failed missions.
Step-by-Step Weapon Usage Flow
This is the rotation order that works across most missions, from the first wave through the Behemoth payoff.
Pre-Wave Setup
Deploy defenses along the main approach routes before the wave indicator fills. Positioning defenses early means zombies walk through damage the entire wave instead of reaching your objectives untouched.
Open with Machine Guns
Let sustained fire handle the front of the wave. This preserves your heavy cooldowns while still applying constant pressure and thinning the horde as it approaches.
Commit Rockets to Clusters
Watch for the moment zombies bunch up, often at choke points or defense lines. A single rocket into a packed group clears more total health than several seconds of machine gun fire.
Hold Airstrikes for Emergencies
Save airstrikes for lanes about to break or sudden special enemy spawns. Their long cooldown means each use should solve a real problem, not just add damage.
All-In on the Behemoth
When a Behemoth appears, dump rockets and focused fire into it while defenses and airstrikes manage the surrounding adds. Never tunnel on the boss while standard zombies flank your position.
Pilots who follow this rotation consistently report longer frontline pushes and fewer failed runs, because every weapon is spent at the moment it provides maximum value.
Weapon Tier Rankings
These rankings weigh wave-clearing efficiency, Behemoth performance, cooldown economy, and team utility. Treat them as general guidance, since balance updates can shift weapon value over time.
| Tier | Weapon Category | Key Strength | Main Weakness |
|---|---|---|---|
| S | Rockets | Burst clears clusters and damages Behemoths | Cooldown limits spam |
| S | Airstrikes | Largest area coverage per use | Longest cooldown |
| A | Machine Guns | Reliable sustained damage, always available | Low value vs durable targets |
| A | Defenses | Passive control, protects objectives | Weak damage on its own |
| B | Unupgraded defenses | Minor slowdown early on | Quickly outscaled by later waves |
Best All-Round Loadout
- Machine Guns + Rockets
- Handles groups and bosses
- Recommended for solo progression
Best Wave Control
- Airstrikes + Defenses
- Dominates dense horde missions
- Needs teammates for boss damage
Best Boss Loadout
- Rockets + focused fire upgrades
- Shortens Behemoth encounters
- Pairs with a crowd-control teammate
Invest Credits into your primary damage source first, then area coverage, then survivability. A rocket upgrade that clears a wave one cycle earlier pays for itself across repeated farming runs.
Weapon Checklist and Team Coordination
Before entering higher difficulty missions, run through this readiness list.
Pre-Mission Weapon Checklist:
- Defenses placed on primary approach routes
- Machine guns ready for sustained wave damage
- Rockets saved for clusters and Behemoth phases
- Airstrikes reserved for emergency lane breaks
- Co-op roles assigned: wave clear vs boss damage
In co-op, the most effective teams split weapon responsibilities. One player builds into area damage and wave control while a teammate specializes in single-target pressure for Behemoths and special enemies. Duplicating the same loadout across the whole team leaves you exposed to whichever threat that build cannot handle.
Assign one player to call targets when special enemies appear. Clear communication converts scattered fire into effective focus damage and keeps defenses from being overwhelmed.
FAQ
Q: What is the best weapon in Zombie Air Force?
There is no single best weapon. Rockets rank highest overall for their burst against clusters and Behemoths, but machine guns provide the sustained damage foundation, and airstrikes offer unmatched emergency wave control. The strongest loadout combines categories rather than maxing one.
Q: When should I use rockets instead of machine guns?
Use rockets when zombies are clustered tightly or when a Behemoth or special enemy appears. Machine guns are better for spread-out targets and between-wave chip damage because they have no meaningful cooldown.
Q: How do I fight Behemoths effectively?
Save your rocket cooldowns for the Behemoth phase, focus fire while maintaining distance and escape routes, and let defenses and airstrikes manage the standard zombies around it. Tunneling on the boss while adds surround you is the fastest way to lose the run.
Q: Do weapon rankings change with balance updates?
Yes. Zombie Air Force is in active development, and updates can adjust damage, cooldowns, and the 180+ upgrade tree. Recheck this guide after major patches, since a cooldown or damage change can shift tier placements.