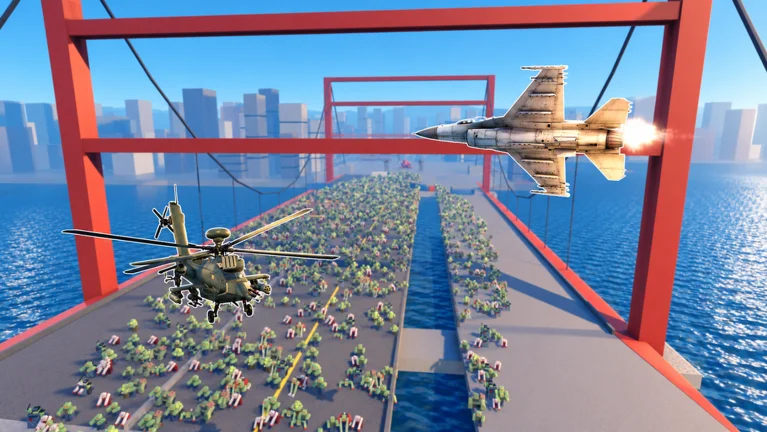
- Zombie Air Force survival depends on wave control, positioning, and disciplined upgrade spending, not raw damage alone.
- Target priority: clear enemies that threaten objectives first, then focus durable Behemoths.
- Upgrade order: primary damage, area damage, survivability, defense, then resource efficiency.
- Co-op rule: split roles—one player on crowd control, one on focused boss damage.
- Farming rule: repeat the hardest stage you can clear reliably without frequent failures.
Core Survival Fundamentals
In Zombie Air Force, survival is a product of positioning and target discipline. Missions are wave-based: zombie groups push toward your objectives, special enemies disrupt your safe space, and Behemoths apply heavy sustained pressure. Players who survive longest are the ones who manage all three threats in the correct order.
The battlefield gives you three tools: your aircraft's aerial attacks (machine guns, rockets, airstrikes), deployable defenses, and mobility. Each tool covers a different threat profile, and the most common failure mode is spending everything on one category while another collapses.
Aerial Offense
- Machine guns for sustained damage
- Rockets for high-value targets
- Airstrikes for dense wave clearing
Defensive Deployment
- Slows and weakens approaching hordes
- Protects high-value objectives
- Covers lanes your aircraft cannot reach
Mobility
- Keeps an escape route available
- Prevents being surrounded
- Extends damage uptime under pressure
Never allow zombie groups to close every path around your position. Reposition before the area becomes crowded—movement you keep now is survival you have later when a Behemoth arrives.
| Threat Type | Threat Level | Primary Pressure | Counter Tool |
|---|---|---|---|
| Standard Zombies | Low to Medium | Numbers and surrounding | Area damage, airstrikes |
| Special Enemies | Medium to High | Disruption, lost safe space | Focus fire, crowd control |
| Behemoths | Very High | Heavy area damage, durability | Focused damage, distance control |
Step-by-Step Survival Workflow
Every run in Zombie Air Force follows a repeatable loop. Master this sequence and you will survive deeper waves without spending extra Credits on gear.
Read the Wave Before Committing
Watch the wave indicator and identify the main attack direction. Hold back your most powerful abilities until you know whether special enemies or a Behemoth are part of the incoming pressure.
Clear Threats to Your Objectives First
Prioritize enemies that restrict movement or can reach the defended area. A safe position produces more damage uptime than standing inside a horde.
Deploy Defenses on Approach Routes
Place defensive structures near important approach lanes and high-value objectives before the wave arrives. Reinforce weak areas between waves, not during them.
Use Area Damage on Clusters Only
Aim rockets and airstrikes at grouped enemies. Spending area damage on isolated low-threat targets leaves you under-equipped for the next dense wave.
Collect and Reinvest Rewards
Spend mission rewards on your primary damage source first, then survivability. Keep a small reserve for progression upgrades that unlock the next stage bracket.
Do not dump every powerful ability the moment a wave begins. Teams that exhaust their damage early have nothing left for the special enemies or Behemoth that arrive at the wave's peak.
Upgrade Priorities for Long-Term Survival
Your upgrade path determines whether you survive late waves or stall out. Concentrate Credits on one primary role at a time—spreading investment across every option leaves every option weak.
| Upgrade Area | Priority | Best Stage | Focus |
|---|---|---|---|
| Primary Damage | High | Early game | Stronger regular attacks and aerial damage |
| Area Damage | High | Early to mid | Multi-target hits for dense waves |
| Survivability | High | Mid game | Aircraft durability, failure prevention |
| Defense Performance | Medium | Mid to late | Lane control, objective protection |
| Resource Efficiency | Medium | Late game | Better rewards and farming speed |
| Build Specialization | Situational | Late game | Commit to a preferred combat role |
Reliable damage shortens battles, which reduces the total pressure your defenses must absorb. Offense is a form of defense in wave-based missions—every enemy killed early is one that never reaches your position.
Survivability becomes essential once missions lengthen. Builds that invest only in offensive output get punished by stronger waves that outlast their damage windows.
Best Survival Builds by Playstyle
The right build depends on your objective. Pick a setup that fills the role your team is missing rather than duplicating what teammates already cover.
Solo Progression Build
- Role: Balanced damage and survivability
- Core: primary damage weapon, area weapon, emergency utility
- Works against both groups and durable targets
- Best for learning unfamiliar stages
Fast Clear Build
- Role: High-tempo crowd clearing
- Core: fast-firing weapon, wide-area option, mobility utility
- Best for rapid wave clearing and short farming runs
- Weak against high-health targets without support
Co-op Defense Build
- Role: Sustained team protection
- Core: sustained-damage weapon, area control, defensive support
- Best for multiplayer and fixed-area defense
- Lower burst damage than offensive builds
Behemoth Damage Build
- Role: Focused anti-boss damage
- Core: high single-target weapon, precision option, boss-pressure defense
- Shortens large-target encounters
- Requires accurate target priority
| Build | Crowd Clear | Boss Damage | Survival | Team Value |
|---|---|---|---|---|
| Solo Progression | ★★★★ | ★★★ | ★★★★ | ★★★ |
| Fast Clear | ★★★★★ | ★★ | ★★★ | ★★★ |
| Co-op Defense | ★★★ | ★★★ | ★★★★★ | ★★★★★ |
| Behemoth Damage | ★★ | ★★★★★ | ★★★ | ★★★★ |
Behemoth Tactics and Co-op Coordination
Behemoths dominate the battlefield when a team loses positioning. They have substantially greater durability than regular enemies and apply heavy attacks across a large area, so uncoordinated teams tunnel on the boss while standard enemies overrun the objective.
The correct division of labor:
| Team Role | Responsibility |
|---|---|
| Focused damage player | Attack the Behemoth with single-target builds |
| Crowd control player | Manage standard and special enemies |
| Support player | Protect defenses, reinforce weak lanes |
The most common co-op failure is the entire team attacking the Behemoth while adds overwhelm the objective. Dedicated damage players hit the boss; control players keep the wave managed.
Survival Milestones:
- Clear waves without losing a defensive objective
- Identify and eliminate special enemies within seconds of spawn
- Survive a full Behemoth encounter with defenses intact
- Complete a co-op run with clear role assignments
- Fund your first primary damage upgrade tier
Farming Credits and Pushing the Frontline
Credits fuel every survival upgrade. The most efficient farming route is the highest repeatable activity you can complete without frequent failures—a slightly easier stage with consistent clears outperforms a harder stage with repeated losses.
| Credit Source | Efficiency | Recommended Method | Priority |
|---|---|---|---|
| Standard stage completion | Consistent | Repeat highest reliable clear | High |
| Wave and survival runs | Higher with strong defenses | Use sustained-damage setups for later waves | High |
| Co-op runs | High when coordinated | Assign distinct roles, avoid duplicated builds | High |
| Optional repeatable rewards | Varies | Claim only when it does not slow better runs | Medium |
Frontline missions reward pushing forward: concentrate early Credits on the weapon or role that defines your build, then invest in survivability to cover its weaknesses. This reaches useful power breakpoints faster than balanced spending across every category.
Upgrade one primary role first. Once your main damage or control tool is effective, add survivability and secondary options. Specialized investment reaches breakpoints that scattered spending never does.
Survival FAQ
Q: What is the most important survival habit in Zombie Air Force?
Keep an escape route open at all times. Reposition before enemies crowd your area so movement remains available when pressure spikes during Behemoth encounters or dense waves.
Q: Which upgrade should I buy first?
Primary damage. Reliable damage shortens battles and reduces pressure on your defenses. Follow with area damage, then survivability as missions get longer and waves get stronger.
Q: How do I deal with Behemoths in co-op?
Assign one player with a focused-damage build to attack the Behemoth while other players control standard and special enemies. Maintain distance, preserve escape routes, and never let the whole team tunnel on the boss.
Q: What is the best way to farm Credits?
Repeat the highest stage you can clear reliably. A slightly easier stage with consistent completions produces more Credits per run than a harder stage where you fail often, especially when using a coordinated co-op group.