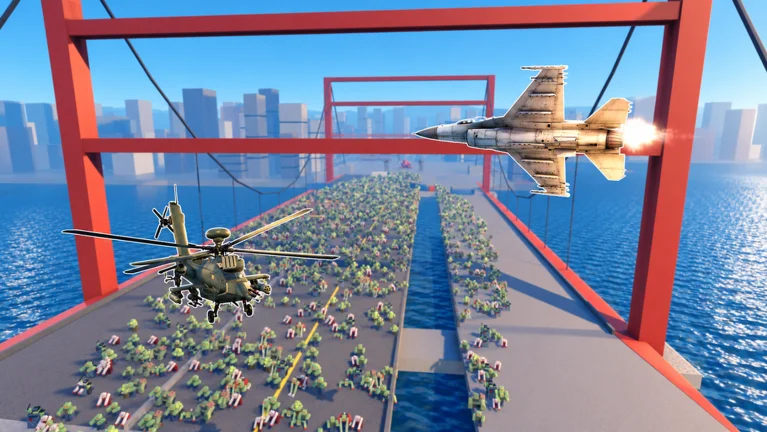
- This Zombie Air Force walkthrough covers the full mission loop from wave one to Behemoth fights.
- Aerial attacks work best against clustered zombies, not isolated targets.
- Upgrade priority: primary damage first, then area damage, then survivability.
- In co-op, split roles between crowd control and focused boss damage.
- Keep an escape route open at all times to avoid being surrounded.
Zombie Air Force Mission Walkthrough Overview
Zombie Air Force is a co-op PvE zombie defense shooter on Roblox developed by fresh green beans, currently in Alpha. You pilot aircraft equipped with rockets, machine guns, and airstrikes to destroy zombie hordes and giant Behemoths while deploying ground defenses to push the frontline. This walkthrough breaks down every stage of a mission run so you can progress further with fewer failures.
The game launched on September 24, 2026 and has drawn over 183K visits with a peak of 1.7K+ concurrent players and an 85% user rating (rotrends, verified October 2026).
Core Mission Loop:
- Enter a mission and survive each zombie wave while completing the objective
- Use aerial attacks on grouped enemies instead of isolated low-threat targets
- Deploy defenses near key approach routes and objectives
- Collect resources between waves and invest in the 180+ upgrade system
- Coordinate roles in co-op to cover separate lanes
Because the game is in Alpha, mission structure, upgrade trees, and balance change with updates. Treat this walkthrough as a framework, and re-check your build whenever a new patch drops.
Step-by-Step Mission Walkthrough
Follow these five stages in order. Each one builds on the last, and skipping ahead (especially ignoring defenses early) is the most common cause of failed runs.
Read the Wave Before It Arrives
Watch the wave indicator and identify the main attack direction. Prioritize threats that can reach or damage the defended area. Position your aircraft so you can respond to the strongest lane without crossing the whole map.
Clear Groups with Aerial Attacks
Aim rockets, machine guns, and airstrikes at clustered enemies. Area damage against dense waves clears far more pressure per shot than chipping at single zombies. Save enough attack capacity for the next wave instead of dumping everything at once.
Deploy Defenses on Key Routes
Place defensive structures near important approach lanes and high-value objectives. Reinforce weak areas between waves rather than after zombies have already broken through. Frontline defenses slow and weaken enemies before they reach your position.
Bank Resources and Upgrade
Spend early Credits on reliable damage improvements first, then area coverage. Add survivability once missions get longer, and keep a reserve for major progression unlocks in the 180+ upgrade system.
Handle Behemoths with Split Roles
When a Behemoth appears, assign focused damage players to the boss while control players manage the remaining wave. Maintain distance, preserve escape routes, and never let the whole team tunnel-vision the boss while standard zombies surround the objective.
The fastest way to lose a run is spending every heavy attack the moment a wave begins. Keep damage and defensive resources in reserve for special enemies, Behemoths, or a sudden collapse of safe space.
Enemy Priority and Behemoth Fights
Enemy priority should be based on immediate danger, not health totals. Threats that restrict movement or damage the objective get cleared first, while durable targets receive coordinated focus fire.
| Enemy Type | Threat Level | Behavior | Best Response |
|---|---|---|---|
| Standard Zombies | Low to medium | Attack in groups, pressure through numbers | Area damage on clusters, keep moving |
| Special Enemies | Medium to high | Disrupt positioning, shrink safe space | Identify early, focus fire, use crowd control |
| Behemoths | Very high | Heavy sustained area pressure, extreme durability | Dedicated focus damage, control the adds, keep distance |
Behemoth fight rules:
- Assign at least one player to dedicated boss damage
- Other players continuously clear standard and special enemies
- Preserve escape routes instead of standing ground in danger
- Reassert wave control if adds start surrounding the objective
In co-op, one player should call the priority target while the rest maintain crowd control. Duplicated roles are the most common reason teams get overwhelmed by the threats their builds cannot handle.
Upgrade Route and Builds
A strong upgrade route matches your progression stage. Early upgrades should help you clear ordinary waves; later upgrades support elite enemies, longer missions, and repeat farming.
| Upgrade Area | Priority | Best Stage | Focus |
|---|---|---|---|
| Primary Damage | High | Early game | Boost regular attack effectiveness against standard waves |
| Area Damage | High | Early to mid | Hit multiple zombies per attack, control dense groups |
| Survivability | High | Mid game | Aircraft durability and tools that prevent mission failure |
| Defense Performance | Medium | Mid to late | Lane control and protection of key objectives |
| Resource Efficiency | Medium | Late game | Farming speed and reward value across repeat runs |
| Build Specialization | Situational | Late game | Commit to a preferred aircraft, weapon, or team role |
Solo Progression Build
- Balanced damage and survivability
- Primary weapon plus area-of-effect option
- Add survival tools before harder content
Fast Clear Build
- High-tempo crowd clearing
- Fast-firing weapon with wide-area damage
- Best for short farming runs and dense waves
Behemoth Damage Build
- Focused single-target output
- High damage plus precision attacks
- Needs defense utility to survive boss pressure
Concentrate early Credits on the one weapon or role that defines your build. Once the main damage or control tool is effective, invest in survivability and secondary options to cover its weaknesses. Farm the highest stage you can clear reliably — consistent completion beats risky losses.
Credits Farming Route
Credits come from several sources, and efficiency varies heavily with your build and team coordination.
| Source | Efficiency | Recommended Method | Priority |
|---|---|---|---|
| Standard stage completion | Consistent | Repeat the highest stage you clear without frequent failures | High |
| Wave and survival runs | Higher with defense builds | Use sustained damage and crowd control through later waves | High |
| Co-op runs | High when coordinated | Assign clear roles instead of duplicating builds | High |
| Optional repeatable rewards | Varies | Claim only when they do not slow down better runs | Medium |
Run Completion Checklist:
- Survive all waves without losing the objective
- Deploy defenses on every key approach route
- Invest first Credits into primary damage upgrades
- Split boss damage and add control during Behemoth fights
- Complete a co-op run with assigned team roles
Walkthrough FAQ
Q: What is the main objective in a Zombie Air Force mission?
Survive each zombie wave while completing the mission's combat objective. You use aircraft attacks, airstrikes, and deployed defenses to control the frontline and protect key positions from the horde and Behemoths.
Q: What should I upgrade first in this Zombie Air Force walkthrough?
Upgrade primary damage first so regular attacks clear standard waves reliably, then add area damage for dense groups, then survivability. Defense performance and resource efficiency upgrades are better saved for mid and late game.
Q: How do I deal with Behemoths?
Assign focused single-target damage to the Behemoth while other players control standard and special enemies. Maintain distance, keep escape routes open, and never let the whole team tunnel on the boss while the objective gets surrounded.
Q: Is it better to farm harder stages for more Credits?
No. The best farming route is the highest repeatable activity you can clear reliably. A slightly easier stage with consistent completion outperforms a harder stage with repeated losses in Credits per hour.
Match your build to the content you are farming. One setup for every situation is the most common progression trap — switch between fast clear and boss damage builds depending on the mission.