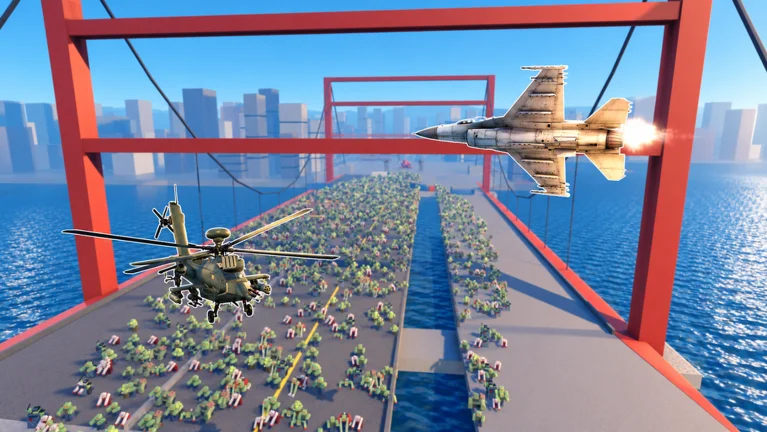
- Zombie Air Force zombie waves are the core threat: surviving each wave is how you complete missions and push the frontline.
- Area damage is the strongest tool against dense groups; save focused damage for special enemies and Behemoths.
- Defense deployment near key approach routes turns chaotic waves into manageable choke points.
- Resource discipline between waves decides long-run survival more than raw damage.
- Co-op role splitting (crowd control, focused damage, defense) prevents wave overload.
How Zombie Waves Work in Zombie Air Force
Every mission in Zombie Air Force is built around surviving zombie waves while completing frontline objectives. You pilot aircraft, strike with rockets, machine guns, and airstrikes, and deploy defensive structures to hold ground. Waves arrive in escalating pressure: standard zombies come in numbers, special enemies disrupt your positioning, and giant Behemoths can dominate a battlefield if your team tunnels on the wrong target.
The wave loop follows a predictable rhythm:
| Wave Phase | What Happens | Your Priority |
|---|---|---|
| Wave start | Enemies spawn from main approach routes | Watch the wave indicator, note attack direction |
| Mid wave | Groups cluster, special enemies appear | Area damage on clusters, focus fire on specials |
| Wave end | Brief pause before next spawn | Reposition, reinforce defenses, reserve resources |
| Boss phase | Behemoth enters with sustained pressure | Split roles: boss damage vs. add control |
Avoid spending every powerful ability the moment a wave begins. Keep enough damage and defensive capacity for special enemies, Behemoths, or a sudden loss of safe space later in the wave.
Threat priority should be based on immediate danger, not enemy health. Clear enemies that block movement or threaten objectives before dumping all damage into a durable target — a safe position produces more damage uptime than standing still in danger.
Wave Threats and Enemy Priorities
Understanding what each wave contains tells you how to spend your attacks. Use this threat table to set target priority:
| Enemy Type | Threat Level | Behavior | Best Response |
|---|---|---|---|
| Standard Zombies | Low to medium | Group pressure at close range | Area damage on clusters, keep moving |
| Special Enemies | Medium to high | Disrupt positioning, shrink safe space | Identify fast, focus fire, crowd control |
| Behemoths | Very high | Heavy sustained area pressure | Dedicated focused damage, keep escape routes |
| Mixed waves | Varies | Boss plus constant adds | Split team roles, never full-tunnel the boss |
While your team focuses a Behemoth, standard and special enemies keep arriving. If everyone attacks the boss, the surrounding wave closes your escape routes and the run collapses. Assign at least one player to wave control at all times.
Standard zombies are only dangerous when they surround players or objectives. Clear the nearest path around your defended area first, then widen from there. Special enemies demand earlier attention — one player should call the target while the rest maintain crowd control.
Step-by-Step Wave Survival Routine
Build a repeatable routine so every wave follows the same disciplined pattern:
Read the Wave Indicator
Check the wave indicator as soon as a wave begins. Identify the main attack direction and which threats can reach your defended area this wave.
Aim Aerial Attacks at Clusters
Concentrate aerial damage on grouped zombies instead of isolated low-threat targets. One area attack hitting several enemies outperforms several attacks on single targets.
Reinforce Defenses Before Pressure Peaks
Place or strengthen defensive structures near important approach routes during the wave-end pause. Protect high-value objectives before the next spawn, not after damage starts.
Reserve Capacity for Specials and Bosses
Keep a portion of your attack and defensive resources available for special enemies, Behemoths, or a sudden loss of safe space mid-wave.
Upgrade Between Waves
Spend mission rewards on reliable damage improvements first, then survivability as missions get longer. Keep a reserve for important progression upgrades.
The strongest improvements come from repeatable habits rather than a single upgrade. Reposition before an area becomes crowded so movement stays available when pressure increases — this alone reduces most avoidable wave deaths.
Best Loadouts and Builds for Wave Control
Different wave situations call for different setups. Pick your build around the objective, and in co-op, cover the role your team is missing.
Fast Clear Build
- High-tempo crowd clearing
- Fast-firing primary weapon plus wide-area damage
- Prioritize attack speed and damage uptime
- Best for: rapid wave clearing, short farming runs
- Weakness: struggles against high-health targets alone
Co-op Defense Build
- Sustained team protection
- Sustained-damage weapon plus area control
- Upgrade crowd-control coverage over burst
- Best for: multiplayer defense, long survival sessions
- Weakness: lower burst damage than offensive builds
Behemoth Damage Build
- Focused damage on large threats
- High single-target weapon plus defensive utility
- Complements teammates running area damage
- Best for: boss phases, high-difficulty survival
- Weakness: inefficient against large standard groups
Solo Progression Build
- Balanced damage and survivability
- Primary damage plus area-of-effect plus emergency utility
- Works against groups and durable targets
- Best for: solo play, learning unfamiliar stages
- Weakness: maximizes no single specialty
Upgrade order matters as much as build choice:
| Upgrade Area | Priority | Best Stage | Why |
|---|---|---|---|
| Primary Damage | High | Early game | Shortens battles, reduces defensive pressure |
| Area Damage | High | Early to mid | One attack affecting several targets tames dense waves |
| Survivability | High | Mid game | Longer missions punish offense-only builds |
| Defense Performance | Medium | Mid to late | Matters when enemies survive attack cycles |
| Resource Efficiency | Medium | Late game | Strong long-term returns once combat build is stable |
Concentrate early Credits on the weapon or role that defines your build. Once the main damage or control tool is effective, invest in survivability to cover its weaknesses. Spreading resources across every option at once slows you to every breakpoint.
Co-op Wave Tactics and Session Checklist
Wave survival in cooperative missions depends on role separation. Duplicating the same build across the team leaves everyone exposed to the threats that build cannot handle.
| Team Role | Responsibility | Wave Behavior |
|---|---|---|
| Crowd Control | Groups of standard zombies | Area damage on clusters, lane coverage |
| Focused Damage | Special enemies and Behemoths | Called targets, sustained boss pressure |
| Defense Support | Objectives and weak lanes | Reinforce defenses, share wave control |
Farm content you can clear reliably. A slightly easier stage with consistent completion outperforms a harder stage with repeated losses — fewer failed runs means better Credits per hour and faster upgrades.
Every Session Checklist:
- Read the wave indicator before each spawn
- Keep an escape route open at all times
- Save burst resources for specials and Behemoths
- Reinforce defenses during wave-end pauses
- Reinvest Credits into one primary role first
FAQ
Q: What are the biggest mistakes during Zombie Air Force zombie waves?
The most common mistakes are spending all damage at wave start, full-tunneling the Behemoth while adds close in, and letting enemies surround your position. Watch the wave indicator, reserve resources for special enemies, and reposition before an area gets crowded.
Q: Should I prioritize area damage or single-target damage?
Prioritize area damage early. Wave-based missions become much more manageable when one attack affects several targets. Add single-target damage in mid game when elite enemies and Behemoths become the main threat.
Q: How do I handle a Behemoth arriving mid-wave?
Assign one or two players to focused Behemoth damage while the rest control standard and special enemies. Maintain distance, preserve escape routes, and never let the entire team ignore the surrounding wave.
Q: What is the best wave-control build for co-op?
A co-op defense build with sustained damage plus area control works best for holding fixed areas through long waves. Pair it with a teammate running focused damage so boss phases and dense waves are both covered.