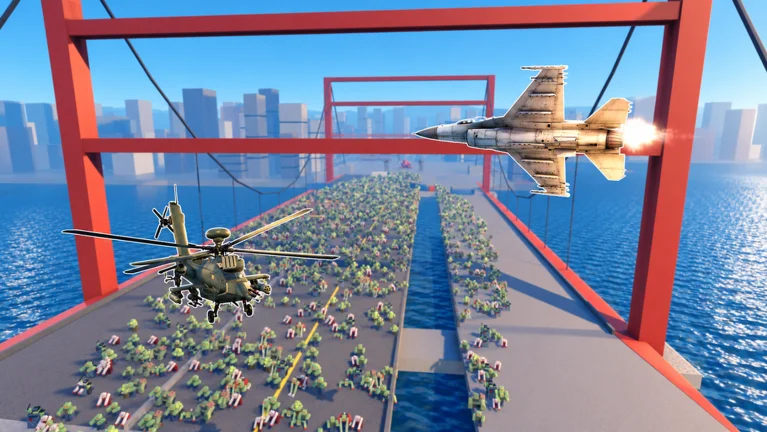
- Zombie Air Force airport is a frontline combat zone built around an airfield players must defend.
- Runway control matters: open sightlines favor aerial area damage.
- Best defense spots cover main approach lanes and hangar chokepoints.
- Co-op roles split into area clearing, Behemoth damage, and lane defense.
- Retreat discipline: always keep an escape route toward open tarmac.
Zombie Air Force Airport: Map Overview
The airport is one of the defining frontline maps in Zombie Air Force. Zombie Air Force airport missions revolve around an airfield where waves push toward the runway and support structures, and where your aircraft's mobility across open tarmac becomes your biggest advantage. Unlike cluttered urban sections, the airport rewards players who read approach lanes early and commit area damage where zombie groups converge.
| Map Zone | Description | Threat Level | Best Use |
|---|---|---|---|
| Main runway | Long open strip, wide sightlines | Medium | Aerial strafing, area damage |
| Hangars | Semi-enclosed structures | High | Chokepoint defense |
| Taxiways | Side routes connecting zones | Medium | Flanking, retreat paths |
| Terminal area | Dense cover, tight lanes | High | Close-range clearing |
| Perimeter fence | Outer spawn edge | Low to medium | Early wave interception |
Before the first wave lands, fly one full pass along the perimeter fence and taxiways. Identifying which lane the horde favors lets you pre-position defenses instead of reacting mid-wave.
Defense Positions and Flight Routes
Winning at the airport depends on pairing the right defense placement with efficient flight patterns. Defenses should slow zombies before they reach the runway, while your aircraft cycles between lanes to apply area damage where pressure builds.
| Position | Coverage | Priority | Notes |
|---|---|---|---|
| Hangar chokepoints | Compresses groups into tight clusters | High | Maximizes area damage value |
| Runway midpoint | Central coverage of main lane | High | Good anchor for solo play |
| Terminal approaches | Blocks flank routes | Medium | Needs support in co-op |
| Perimeter gaps | Delays early spawns | Medium | Buys time for repositioning |
Runway Circuit
- Wide looping path along the main strip
- Best for sustained strafing runs
- Keeps escape routes open
Hangar Shuttle
- Short passes over chokepoints
- Ideal for area weapons
- Pairs well with placed defenses
Perimeter Sweep
- Intercepts spawns at the fence line
- Reduces early pressure
- Strong opener each wave
Parking all defenses at one terminal lane leaves the runway exposed. Distribute coverage across at least two approach lanes, or a single Behemoth push from the open side will collapse the line.
Wave-by-Wave Airport Strategy
Each wave at the airport shifts pressure between the terminal lanes and the open runway. Follow this sequence to keep the frontline stable through later, heavier waves.
Pre-Wave Recon
Fly the perimeter before the wave indicator fills. Note the primary spawn lane and pre-place defenses at the matching chokepoint.
Early Interception
Hit groups at the fence line with area damage while they are still clustered. Dense early spawns are the cheapest kills of the wave.
Mid-Wave Lane Control
Rotate between the terminal approaches and runway midpoint. Clear enemies that block movement before dumping damage into durable targets.
Elite and Behemoth Response
When special enemies or a Behemoth enter, split roles: focused damage on the big target, area damage on surrounding adds. Keep escape routes toward open tarmac.
Post-Wave Reset
Repair or reinforce weakened defense points and spend collected Credits on the upgrade that matches your build role before the next wave.
Avoid spending every heavy attack the moment a wave begins. Special enemies and Behemoth phases arrive mid-to-late wave, and reserved firepower is what keeps the airport line from breaking.
Co-op Roles and Airport Checklist
In cooperative airport runs, duplicated builds are the most common failure point. Assign one player to crowd control, one to focused Behemoth damage, and one to lane defense support instead of stacking three identical damage builds.
| Role | Focus | Key Upgrades | Airport Application |
|---|---|---|---|
| Area clearer | Wave control | Area damage, attack uptime | Runway and fence clusters |
| Behemoth hunter | Single-target damage | Concentrated damage, mobility | Boss phases on open tarmac |
| Lane defender | Defense support | Sustained damage, defensive tools | Hangar and terminal chokepoints |
One player should call out priority targets each wave. Clear communication prevents the whole team from tunneling on a Behemoth while standard zombies surround the objective.
Airport Run Checklist:
- Complete a full perimeter recon before wave one
- Cover at least two approach lanes with defenses
- Hold a heavy attack in reserve for elite spawns
- Assign distinct co-op roles before starting
- Reinvest Credits into your primary role each wave
FAQ
Q: What is the Zombie Air Force airport map best known for?
The airport centers on an airfield with a long open runway, hangar chokepoints, and terminal lanes. Its open sightlines make it one of the best maps for aerial area damage and looping strafing runs.
Q: Where should I place defenses on the airport map?
Prioritize hangar chokepoints and the runway midpoint first, then add coverage at terminal approaches. Spread defenses across at least two lanes so a single push cannot collapse your whole line.
Q: How do I handle Behemoths at the airport?
Use the open tarmac to keep distance and preserve escape routes. Assign focused damage to the Behemoth while teammates control surrounding zombie groups, and never let the entire team tunnel on the boss.
Q: Which build works best for airport missions?
Area damage builds perform strongest because waves converge through predictable lanes. Balanced damage-and-defense builds are the most reliable choice for solo runs or learning the map.