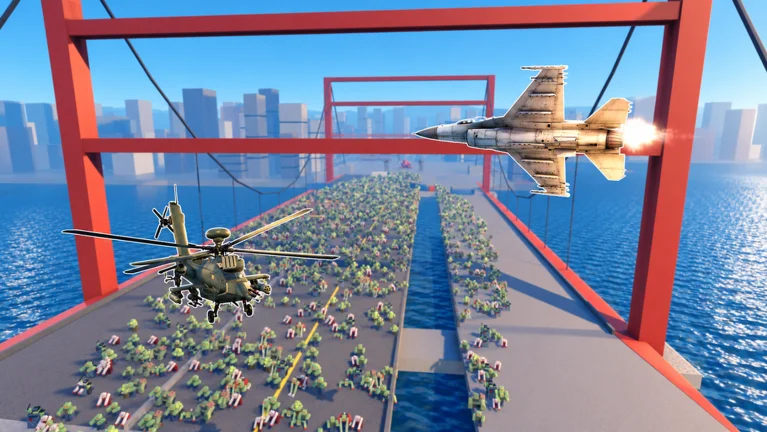
- The Zombie Air Force map is built around a frontline that advances as waves are cleared.
- Zombie spawns concentrate along approach lanes; hold them with defense placements, not raw damage.
- Flight routes matter more than firepower: positioning keeps your damage uptime high.
- Behemoths enter from the main pressure lane; coordinate focus fire while others control adds.
- The game is in Alpha, so map layouts may shift between updates.
Zombie Air Force Map Layout Overview
The Zombie Air Force map is organized around a single core concept: a frontline that you push forward by clearing zombie waves and destroying high-value targets like Behemoths. Instead of scattered arenas, the battlefield flows from defended territory into enemy-held ground, and every mission asks you to convert air superiority into map control.
The three functional zones you need to recognize are summarized below.
| Map Zone | Purpose | Threat Profile | Best Response |
|---|---|---|---|
| Defended base area | Objectives and deployable defenses | Rising as waves stack | Fortify approach lanes early |
| Frontline strip | Main contact zone with zombie waves | Medium to high | Area damage on clusters |
| Enemy-held ground | Spawn region for waves and Behemoths | Very high on push phases | Focus fire and coordinated pushes |
Zombie Air Force is still in its Alpha stage, and the developer ships frequent changes. Treat every layout detail here as a framework rather than fixed geometry, and re-check the frontline after each update before committing your defense plan.
Map awareness is your first upgrade. Players who learn where enemies enter and which lanes matter stop wasting ammunition on low-threat targets and start controlling the fight instead of reacting to it.
Frontline Push: How the Map Advances
Frontline progression is the heartbeat of every Zombie Air Force mission. The map rewards teams that clear methodically and punishes those who overextend into enemy ground before the current wave is handled.
Secure the Base Perimeter
Identify the approach lanes feeding your defended area. Deploy defenses along the routes that carry the most pressure so the objective is never exposed during early waves.
Clear the Contact Zone
Concentrate air attacks on clustered zombies inside the frontline strip. Area damage here shortens each wave cycle and builds the opening for a push.
Push With Cover
Advance only after the current wave thins out. Move the frontline in controlled steps so your defenses and teammates keep pace behind you.
Handle Behemoth Lanes
When a Behemoth spawns, hold the push. Assign focused damage to the boss while the rest of the team maintains lane control around it.
The most common map mistake is chasing kills into enemy ground during a push window. Keep at least one escape route behind your aircraft at all times; a crowded position usually costs more damage than it creates.
Key Defense Positions and Flight Routes
Winning on the map is about pairing the right defense spot with the right flight pattern. Fixed defenses anchor lanes while your aircraft covers gaps and punishes clusters.
Lane Chokepoints
- Narrow approach routes concentrate zombies
- Best for area damage
- Reinforce before wave spikes
Objective Perimeter
- Protects high-value targets
- Best for sustained defense
- Prioritize when waves survive your attacks
Spawn-Adjacent Ground
- Aggressive forward zone
- Best for coordinated teams
- Only push with Behemoth pressure under control
Your flight route should loop rather than hover. A circuit between the frontline and your defenses keeps you near ammunition-efficient attack angles while preserving distance from special enemies that can disrupt positioning.
| Route Type | Flight Pattern | Strengths | Risk Level |
|---|---|---|---|
| Defensive loop | Base perimeter to frontline and back | Safe, consistent damage | Low |
| Aggressive sweep | Along spawn-adjacent ground | Fast wave clearing | High |
| Support circuit | Between teammate lanes | Covers gaps, revives momentum | Medium |
Match your route to your build. Fast-clear builds suit aggressive sweeps, while co-op defense builds get more value from a support circuit that keeps the whole team covered.
Map Control Checklist for Co-op Teams
Consistent map control comes from repeatable habits rather than individual hero plays. Use this checklist before and during every frontline push to keep your team organized.
Frontline Map Control Checklist:
- Identify all approach lanes before the first wave
- Deploy defenses on the two highest-pressure routes
- Assign one player to Behemoth focus fire
- Keep an escape route open during every push
- Reserve attack capacity for wave spikes and special enemies
Divided roles win maps. One player handling crowd control, another on focused damage, and a third anchoring defense produces more frontline progress than three players duplicating the same build.
Zombie Air Force Map FAQ
Q: What is the frontline in the Zombie Air Force map?
The frontline is the shifting boundary between your defended territory and enemy-held ground. You advance it by clearing zombie waves and defeating Behemoths, while defenses protect the ground you have already secured.
Q: Where should I place defenses on the map?
Focus on lane chokepoints and the perimeter of high-value objectives. Reinforce the two routes carrying the most enemy pressure, and add more coverage once waves begin surviving your opening attacks.
Q: How do Behemoths change map strategy?
When a Behemoth spawns from the main pressure lane, pause your push. Assign focused damage to the Behemoth while other players control the surrounding wave so the team does not get overwhelmed while tunneling on the boss.
Q: Can the Zombie Air Force map change between updates?
Yes. The game is in Alpha, so the developer adjusts layouts, spawns, and progression regularly. Re-verify lane positions and defense spots after each update before committing your Credits to a fixed plan.
Spend one full run observing spawn directions without pushing aggressively. That single reconnaissance pass usually reveals lane patterns that improve every later mission.