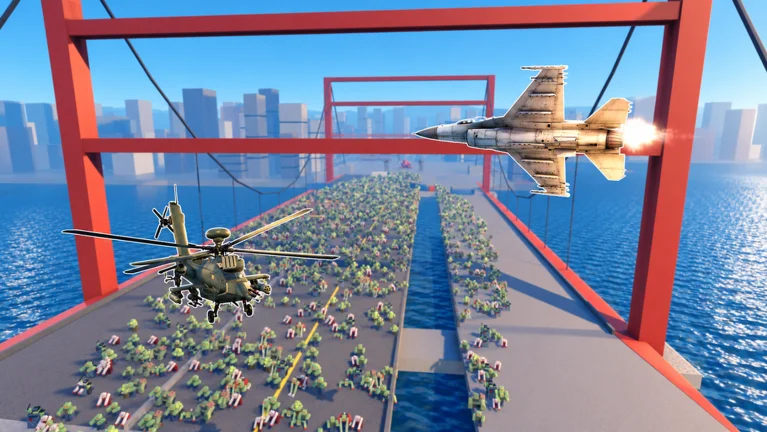
- Zombie Air Force missions reward wave survival, frontline pushes, and objective defense.
- Aerial attacks work best against clustered zombie groups, not isolated targets.
- Defense deployment near approach routes keeps key objectives safe between waves.
- Co-op teams should split into crowd control, focused damage, and defense roles.
- Behemoth encounters demand dedicated focus fire while others manage adds.
How Zombie Air Force Missions Work
Missions in Zombie Air Force are built around a repeating loop: incoming zombie waves, a combat objective to defend or push, and escalating threats that end in elite enemies or a giant Behemoth. Each mission tests three skills at once — how efficiently you use your aircraft's aerial attacks, how well you position defenses, and how you spend the resources earned between runs on the game's 180+ upgrades.
The core objective is always frontline control. Zombies push toward your defended positions in waves, and your job is to destroy them from the air before they overwhelm the ground. Failing usually comes down to one of three causes:
- Losing track of the wave indicator and getting caught mid-reload
- Spending heavy attacks on isolated low-threat targets too early
- Leaving defensive gaps near the main approach routes unattended
| Mission Phase | What Happens | Your Priority |
|---|---|---|
| Wave start | Zombies spawn and move toward objectives | Check indicator, note attack direction |
| Mid-wave | Groups cluster, special enemies appear | Use area damage on clusters, mark specials |
| Late wave | Pressure peaks near objectives | Reinforce defenses, hold escape routes |
| Elite/Boss | Special enemies or Behemoth enter | Focus fire, maintain crowd control |
Before committing any powerful attack, watch how the wave is forming. A strike saved for the moment zombies cluster near your objective is worth far more than the same strike fired at scattered enemies in the open.
Step-by-Step Mission Completion Flow
Follow this sequence in every mission. It works for solo runs and scales directly into cooperative play.
Identify the Threat Direction
At wave start, check the wave indicator and determine where zombies are spawning from. Prioritize any path that leads directly to the defended objective, and reposition your aircraft so your firing line covers it.
Clear Clusters with Area Attacks
Hold fire until enemies group up. Rockets, strafing runs, and airstrike tools are dramatically more efficient against five zombies in a tight cluster than against two stragglers. Attack dense groups first and let defensive structures mop up survivors.
Deploy Defenses on Approach Routes
Place defensive structures near the routes zombies actually use, not where they look symmetrical. Protect high-value objectives first, and reinforce the weakest lane before the next wave begins rather than after it arrives.
Handle Special Enemies Immediately
When a special enemy appears, identify it and decide instantly: focus fire if it threatens the objective, or slow it with crowd control if standard zombies are the bigger problem. Never let specials roam free while the team grinds routine targets.
Bank Resources for Behemoth Phases
Keep at least one heavy attack and one defensive option in reserve. Behemoths have far greater durability than regular enemies, and a team that dumped everything on the wave before the boss will lose positioning — and the mission.
Tunnel vision on the biggest target on the field is the number one reason teams wipe. During Behemoth fights, at least one player must keep clearing standard and special enemies, or the team gets surrounded while everyone stares at the boss.
Threat Priorities: Zombies, Specials, and Behemoths
Target priority should be based on immediate danger, not health bars. A half-health special enemy blocking your movement is a bigger threat than a full-health zombie walking the long way around the map.
Standard Zombies
- Threat: Low to medium
- Dangerous only in groups
- Counter with area damage on clusters
- Keep moving to avoid encirclement
Special Enemies
- Threat: Medium to high
- Disrupt positioning, shrink safe space
- Call the target, focus fire fast
- Use crowd control to prevent disruption
Behemoths
- Threat: Very high
- Heavy area attacks, huge durability
- Dedicated damage player engages at range
- Others control adds and keep escape routes open
| Enemy Type | Threat Level | Best Response | Team Role |
|---|---|---|---|
| Standard Zombies | Low-Medium | Area damage on groups | Crowd-control player |
| Special Enemies | Medium-High | Fast focus fire | Called target for all |
| Behemoths | Very High | Sustained single-target damage | Dedicated boss damage |
Never let enemies close every path around your position. Reposition before the area gets crowded — movement available under pressure is the difference between a survivable wave and a lost run.
Co-op Role Assignments
Cooperative missions succeed or fail on role division. Duplicating the same build across the whole team leaves you exposed to whatever that build cannot handle. Split into three functions:
| Role | Loadout Focus | Responsibilities |
|---|---|---|
| Crowd Control | Area damage, wide coverage | Clear zombie groups, hold lanes |
| Focused Damage | Single-target weapons | Kill specials and Behemoths |
| Defense Support | Sustained damage, defensive utility | Protect objectives, reinforce lanes |
In practice, the crowd-control player keeps the standard waves compressed so the focused-damage player gets clean windows on elite targets, while the defense-support player watches the objective and patches whichever lane is losing ground. Even a two-player team should split into crowd control plus focused damage rather than running identical builds.
Co-op missions are among the highest Credit-earning activities in the game — but only when the team is coordinated. Assign roles before the wave starts, not during it.
Farming Missions for Credits
Progression in Zombie Air Force depends on spending Credits from mission rewards on the right upgrades at the right time. The most useful farming route is the highest mission you can clear reliably without frequent failures — a slightly easier mission completed consistently outperforms a harder one that you fail half the time.
| Source | Efficiency | Best Use | Priority |
|---|---|---|---|
| Standard mission completion | Consistent | Early upgrades | High |
| Wave and survival runs | Higher with defensive builds | Mid-game funding | High |
| Co-op runs | High when coordinated | Expensive upgrades | High |
| Repeatable bonuses | Varies | Filling small gaps | Medium |
For upgrade spending, concentrate early Credits on your primary damage source first — it shortens battles and reduces pressure on your defenses. Add area coverage next for clustered waves, then survivability before pushing into higher-difficulty missions. Defense and resource-efficiency upgrades deliver their best returns once the core combat build is stable.
Do not bring one setup to every activity. Fast-clear builds suit short farming runs on standard zombies; Behemoth damage builds belong in boss-heavy missions. Swapping your loadout to match the content is free efficiency.
Before Every Mission Run:
- Check the wave indicator and threat direction
- Confirm your loadout matches the mission type
- Assign co-op roles before the first wave
- Reserve one heavy attack for specials or Behemoths
- Plan escape routes around your defense positions
FAQ
Q: What is the main objective in Zombie Air Force missions?
Each mission requires surviving zombie waves while defending or pushing objectives along the frontline. You use aerial attacks from your aircraft, defensive structures, and upgrades to destroy zombie hordes, special enemies, and giant Behemoths before they overwhelm your positions.
Q: Why do I keep failing later waves?
Most late-wave failures come from two habits: spending heavy attacks on isolated targets early in the mission, and tunnel vision on one big enemy while standard zombies surround the objective. Reserve your strongest attacks for cluster moments and always keep one player managing the wider wave.
Q: What is the best mission to farm for Credits?
Farm the highest mission you can clear consistently without frequent failures. Co-op runs are the most efficient overall when the team splits into crowd control, focused damage, and defense support roles, but a reliable solo mission you never fail can outperform a harder one you lose repeatedly.
Q: How should I handle a Behemoth in a mission?
Assign your focused-damage player to attack the Behemoth while maintaining distance and escape routes. Everyone else keeps clearing standard and special enemies so the team does not get surrounded. Concentrate sustained single-target damage rather than burst, and keep defensive options in reserve.