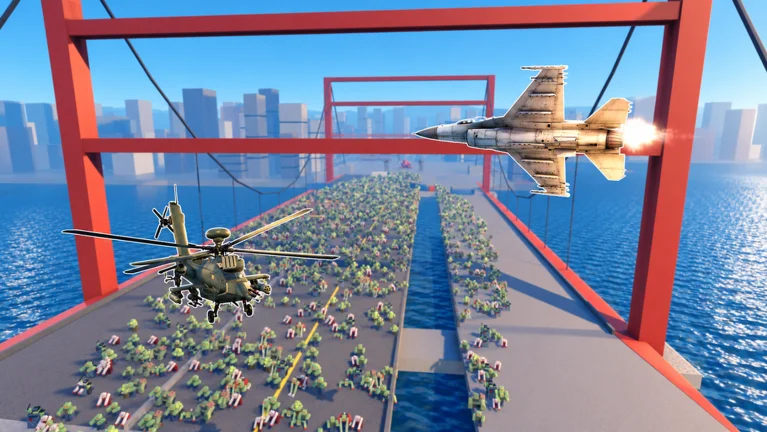
- Zombie Air Force missions are wave-based frontline objectives where you fly aircraft against zombie hordes and giant Behemoths.
- Frontline pushing is the core loop: clear waves, deploy defenses, and advance the line stage by stage.
- Co-op role division matters most: split crowd control, focused damage, and defense instead of duplicating builds.
- Credits rewards scale with wave count and completion consistency, so reliable clears beat risky high-stage attempts.
- Behemoth phases demand reserved ammo and escape routes; never dump every ability at wave start.
Mission Structure and Objectives
Zombie Air Force missions follow a wave-based frontline format. Each mission drops you into an active battlefield where zombie groups press toward key positions, and your job is to combine aerial attacks, rockets, machine guns, airstrikes, and deployable defenses to hold the line and push it forward. The mission ends when the frontline objective is completed or the defended position is lost.
Every mission follows the same basic rhythm, which makes learning the loop the single highest-value skill for new pilots:
| Mission Phase | What Happens | Your Priority |
|---|---|---|
| Wave start | Zombie groups spawn from approach routes | Check wave indicator, identify main attack direction |
| Mid wave | Groups converge on objectives | Area damage on clusters, protect key routes |
| Special spawn | Higher-threat enemies appear | Shift focus fire, call targets in co-op |
| Behemoth phase | Giant boss-level enemy enters | Focused damage, maintain escape routes |
| Wave clear | Brief recovery window | Reinforce defenses, reposition, reload |
Do not spend every heavy ability the moment a wave begins. Keep enough rockets and airstrike capacity in reserve for special enemies or a Behemoth appearing mid-wave.
Missions are won by advancing the frontline, not by kill count alone. Clearing the path around the objective first produces more damage uptime than chasing isolated zombies on the edges of the map.
Enemy Priorities During Missions
Target priority should be based on immediate danger, not enemy health. The three threat tiers below cover everything you will meet during standard frontline missions:
| Enemy Type | Threat Level | Attack Pattern | Recommended Response |
|---|---|---|---|
| Standard Zombies | Low to medium | Close-range swarm pressure | Area damage on groups, keep moving |
| Special Enemies | Medium to high | Disrupts positioning, shrinks safe space | Identify early, focus fire, use control |
| Behemoths | Very high | Heavy sustained area pressure | Dedicated focused damage, keep escape routes |
Standard Zombies
- Appear in large groups
- Dangerous only when surrounding objectives
- Best handled with area damage weapons
Special Enemies
- Stronger pressure than common zombies
- Disrupt positioning and safe space
- Never ignore while tunneling on routine targets
Behemoths
- Boss-level durability and area attacks
- Dominate the field if positioning collapses
- Require coordinated damage and defensive play
During Behemoth phases, at least one player must keep controlling standard and special enemies. Full-team tunnel vision on the boss is one of the most common mission failure causes.
Step-by-Step Mission Walkthrough
This sequence covers a standard frontline mission from deployment to reward screen. Follow it in order during your first runs, then adapt it to your build.
Assess the Battlefield
Enter the mission, watch the wave indicator, and identify the main zombie attack direction. Note choke points and the objective you are defending before engaging.
Clear with Area Attacks
Aim aerial attacks at clustered enemies rather than isolated low-threat targets. One pass over a dense group saves ammunition for the phases that matter.
Deploy Defenses
Place defensive structures near important approach routes and high-value objectives. Reinforce weak areas during the recovery window between waves.
Handle Specials and Behemoths
Call out special enemies the moment they spawn and assign focused damage. When a Behemoth appears, dedicate one or two players to it while the rest control the wave.
Push and Collect
Advance the frontline as waves clear, collect mission rewards, and spend Credits on your primary damage source before anything else.
The most productive mission route is the highest stage you can clear reliably without frequent failures. A slightly easier mission with consistent completion outperforms a harder one with repeated losses.
Co-op Mission Roles and Builds
Cooperative missions reward role division. Duplicating the same build across a squad leaves the team exposed to whatever that build cannot handle. Use these role splits for frontline missions:
| Role | Core Loadout | Mission Responsibility |
|---|---|---|
| Crowd Clear | Fast-firing weapon, wide-area damage option | Control standard zombie groups, maintain lane safety |
| Behemoth Damage | High single-target weapon, precision option | Focus boss-level threats, shorten large encounters |
| Defense Support | Sustained-damage weapon, defensive utility | Protect objectives, hold choke points, cover teammates |
| Upgrade Area | Priority | Best Stage | Focus |
|---|---|---|---|
| Primary Damage | High | Early game | Improve regular attacks against standard waves |
| Area Damage | High | Early to mid | Hit multiple zombies, control dense groups |
| Survivability | High | Mid game | Aircraft durability, prevent failed missions |
| Defense Performance | Medium | Mid to late | Strengthen deployment and lane control |
| Resource Efficiency | Medium | Late game | Reward value and farming speed |
In co-op missions, have a single player call the priority target while the rest maintain crowd control. Clear calls produce better focus fire than everyone choosing their own target.
Concentrate early Credits on the weapon or role that defines your build. Once the main damage or control tool is effective, invest in survivability to cover its weaknesses.
Mission Rewards and Farming Checklist
Mission rewards in Zombie Air Force primarily come through Credits earned from stage completion, extended wave survival, and co-op progression. Reinvest them in the order shown above, and use the checklist below to build a repeatable mission routine.
| Reward Source | Efficiency | Recommended Method | Best Use |
|---|---|---|---|
| Standard stage completion | Consistent | Repeat the highest reliable clear stage | Early upgrades |
| Wave and survival completion | Higher with defensive builds | Sustained damage plus crowd control | Mid/late upgrades |
| Co-op runs | High when coordinated | Assign clear roles, avoid duplicate builds | Expensive upgrades |
| Repeatable bonuses | Varies by activity | Claim without slowing better runs | Supplemental income |
Pre-Mission Routine:
- Check wave indicator and attack direction on deployment
- Keep escape routes open around defended positions
- Reserve rockets and airstrikes for specials and Behemoths
- Reinforce defenses during wave recovery windows
- Reinvest Credits into primary damage before secondary stats
FAQ
Q: What are Zombie Air Force missions about?
Missions are wave-based frontline objectives where you pilot aircraft against zombie hordes and Behemoths. You clear waves, deploy defenses, and push the frontline forward using rockets, machine guns, airstrikes, and defensive structures.
Q: Why do my missions keep failing?
The most common causes are tunneling on Behemoths while standard zombies swarm the objective, dumping all abilities at wave start, and building only offense with no survivability. Fix target priority and reserve heavy attacks for dangerous phases.
Q: Which missions are best for farming Credits?
Farm the highest stage you can clear reliably without frequent failures. Consistent completion produces better Credits per run than risky attempts at harder stages, especially when using sustained-damage and crowd-control builds.
Q: How should a co-op team split roles in missions?
Assign one player to crowd clearing, one or two to focused Behemoth damage, and one to defense support. Duplicating the same build across the squad leaves the team exposed to threats that build cannot handle.